MacBook Pro 14 M3 2023 (A2918) Screen Replacement in St Helens
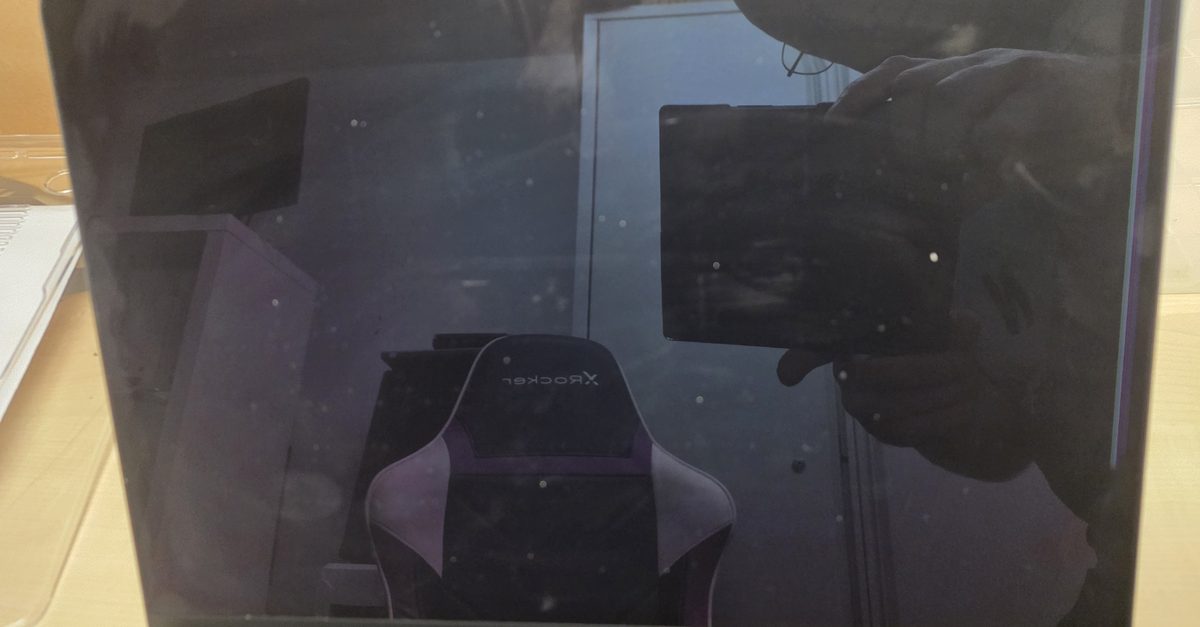
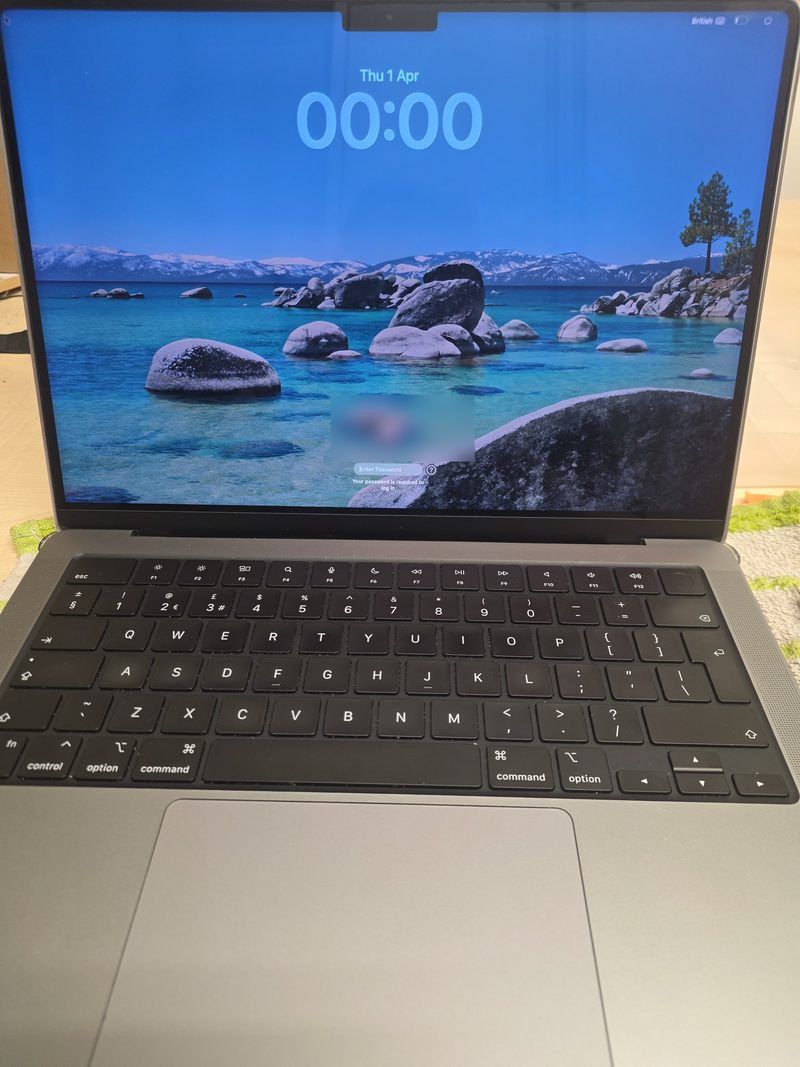
A black screen with one line on a 14-inch MacBook Pro
A client in St Helens brought me their MacBook Pro with no picture on the screen. It was switched on and running, but the display was black apart from one thin line top to bottom down the right-hand side. It's a 14-inch M3 from late 2023 in Space Grey, model A2918.
You can see it in the photo above. That's the Mac on, at the point where it should be showing the login screen. Instead there's a purple and green stripe near the right edge and nothing else. The Mac itself was fine. It was only the display.
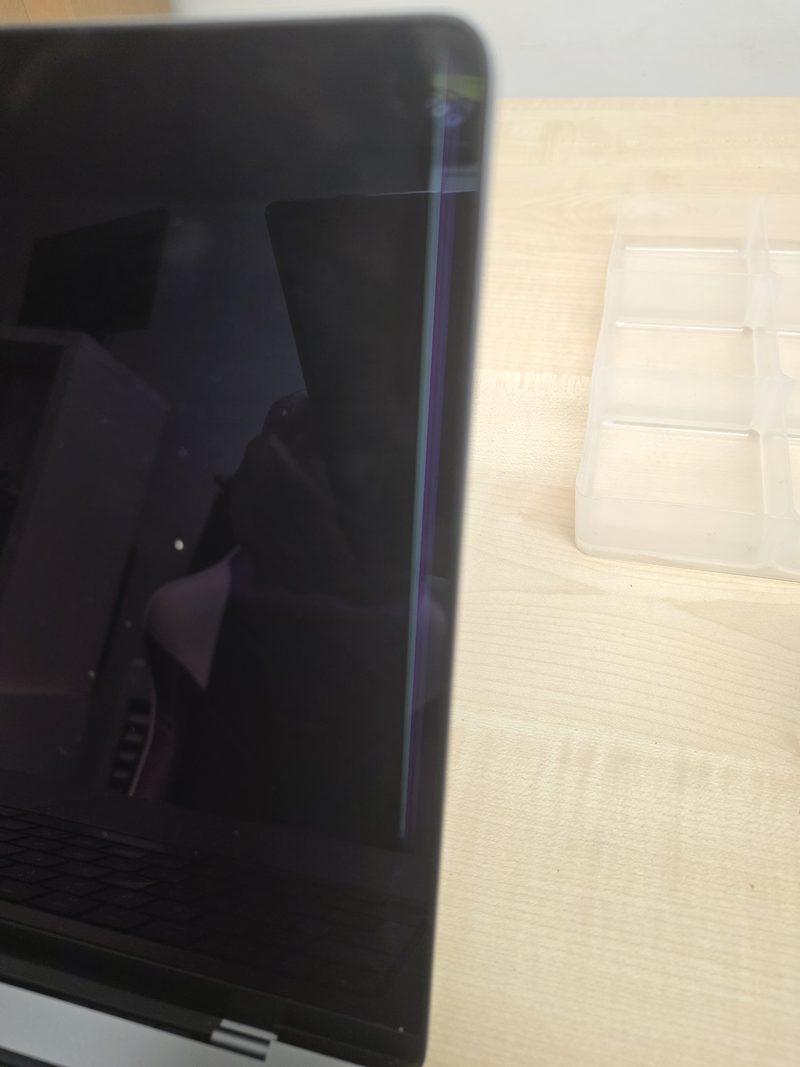
A black screen with a line still lit means the display is getting power, but the panel or the connection inside the lid has failed. It's not something software or a reset will shift. If you plug the Mac into a TV or monitor and that picture is clean, you know the rest of the machine is fine and it's the display.
Why the whole display assembly gets replaced
On a lot of Windows laptops I swap just the LCD panel and keep the lid. These MacBook Pros don't work like that. The screen, the glass, the lid, the hinges, the camera and the cables all come as one part, and that's what gets fitted. It costs more than a bare panel, but there's no fiddly bonded glass to separate and nothing to go wrong with refitting an old lid.
Make sure you get the one for your model number. The A2918 is the plain M3 version. The M3 Pro and M3 Max 14-inch look almost identical but have a different model number, and you want the right colour too. The model is printed in tiny writing on the bottom of the case.
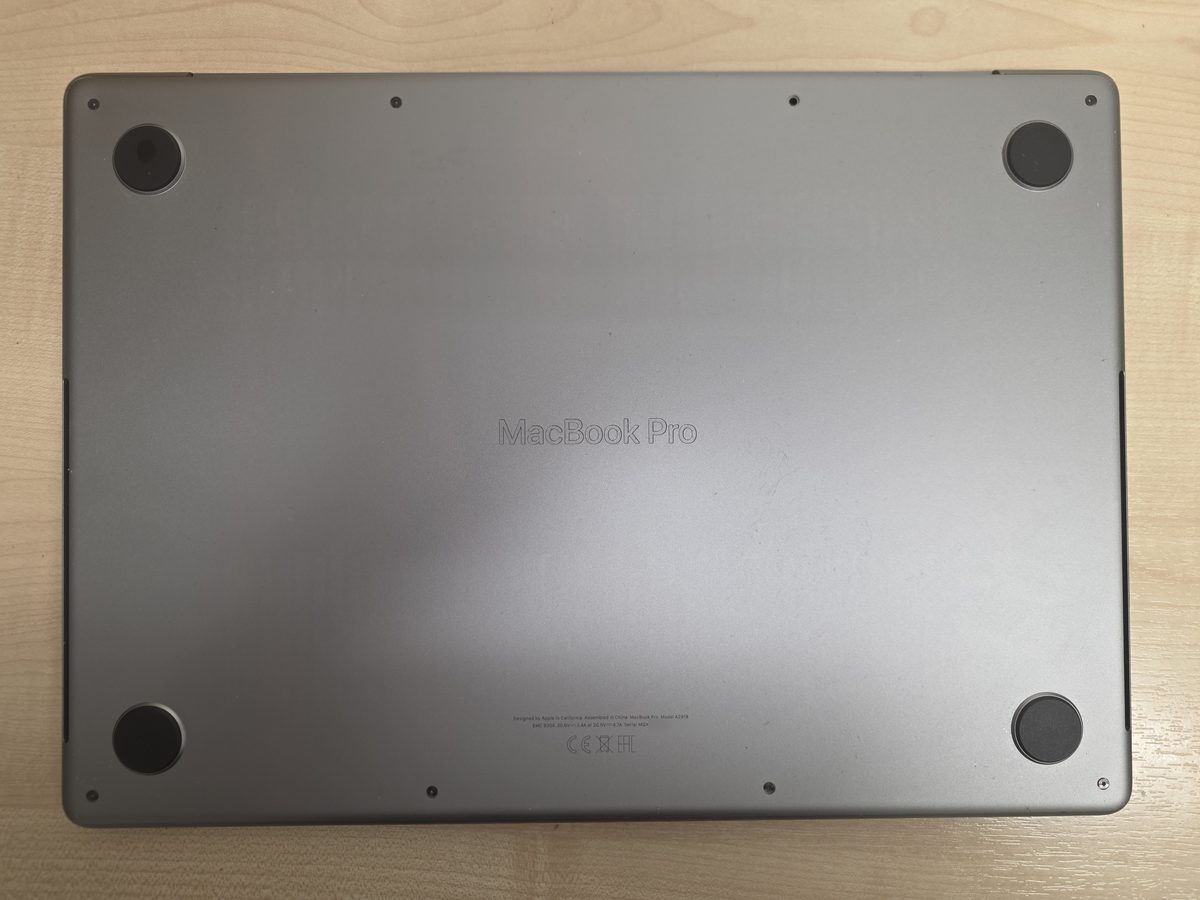
Getting the bottom case off
Before I start I make sure the battery is well run down. Apple and iFixit both suggest under 25%. With a lithium battery sitting right next to where you're working, less charge in it is safer if anything slips.
The bottom case is held on by eight P5 pentalobe screws. They're not all the same: the four along the hinge edge are longer than the four at the front, so keep them apart. Mix them up and the longer ones go in at the front where they shouldn't.
Then there are clips. The two at the back slide rather than pop, so the case has to be eased away from the hinge end first. After that the clips down the sides and in the middle let go with a click each. Go gently near the speaker grilles at the front corners. The speakers are right under the edge and a pry tool pushed in too far will damage them.
Disconnecting the battery
On the M3 there's no handy plug at the edge of the board. The battery connects in the middle, between the cells, and to get to it you have to clear a few things out of the way first: a small cover over the trackpad connector, the trackpad cable that sticks lightly to the battery board, and the thin battery data cable with a locking flap at each end.
Once those are out of the way there's one Torx screw holding the main battery connector down. Screw out, connector lifted up off the board, and I slip something non-conductive under it so it can't spring back and touch. Don't lift it too far either. It only needs to clear the board, and bending it back past about 45 degrees risks snapping it.
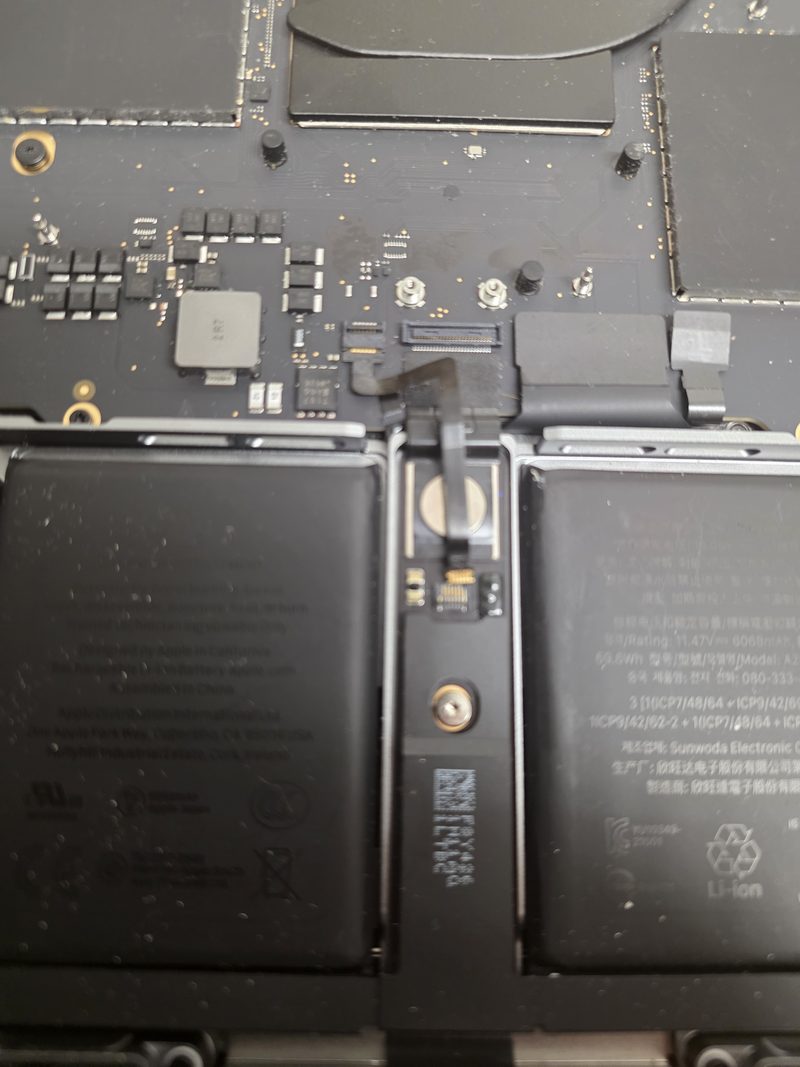
I always do this, even on a screen job. The display cables plug into the logic board, and plugging or unplugging anything with the battery live is how you short something out. A MacBook logic board costs a lot more than a screen.
Unplugging the display
The display cables are at the back of the logic board, under the hinge line, and there's a fair bit in the way:
- The aerial bar along the back edge. It has its own cover, three tiny aerial connectors and a lot of screws, some pentalobe and some Torx. The aerial connectors are lifted with tweezers by the metal neck, never by the wire.
- The two covers over the screen connectors. Under them are three press-fit connectors for the display. They pop straight up, same as a phone.
- The cable brackets on each side, which clip into the frame, and the little plastic buffers that sit under the cables.
- The lid angle sensor connector, which tells the Mac how far the lid is open.
- The hinge covers, two screws each.
That leaves the display hanging on six hinge screws. I open the screen to 90 degrees, lay the Mac keyboard down at the edge of the bench with the lid hanging over and supported by hand, and take the screws out from there. Then the display lifts away, hinges and all. Keep the hinges clear of the logic board as they come out, because there are components right next to them.
None of it is difficult, but it's a lot of very small screws in a lot of different lengths. I lay them out in order on a mat as they come out, so they go back in the same holes.
Building it back up
It all goes back together in reverse. The bit worth taking your time over is the hinges. The new display drops into place and the six hinge screws go in loosely first. Then I line it up so it's square to the base and not rubbing on either side, and only then tighten them. If you tighten them one at a time, the lid ends up slightly skewed and you'll hear it catch or click when you open it.
Then the cable buffers, brackets and press connectors, the lid angle sensor, the aerial bar, and the battery cable last. The press connectors click when they're seated. If one doesn't click, it isn't on properly.
Testing the new display
Before the bottom case goes back on I power it up and look at the screen properly. A plain white background shows up lines and dead pixels, a black one shows up any light leaking round the edges, and I open and close the lid a few times to make sure the picture doesn't flicker or drop out. If it does, a cable is pinched or not seated, and you'd much rather find that with the case still off.
It came up first time with a proper picture across the whole screen. Everything was where the client left it. A screen swap doesn't go near the storage, so there's no reason anything would be lost.
One more thing on newer Macs. After a new display goes in, macOS can show it as an unknown part, and True Tone and auto-brightness may stay off until it's been through Apple's Repair Assistant. That's under System Settings, General, About, then Parts & Service. It needs an internet connection and takes a few minutes.
If you're thinking of doing it yourself
iFixit rates it moderate and puts it at one to two hours. You'll need P5 and P2 pentalobe bits and a few sizes of Torx Plus, not ordinary Torx. Their step-by-step guide is good and has every screw length listed. Disconnect the battery first, keep the screws in order, and don't rush the hinges.
Before you buy a display, plug the Mac into a monitor. If the picture on the monitor is clean, a display will fix it. If the monitor shows the same line or nothing at all, the problem is somewhere else and a new display won't help.
If you're in St Helens or nearby and your MacBook screen has gone black, has lines or is cracked, send me the model number off the bottom and I'll quote for the right part. Have a look at my Mac repair page for how I work. Get in touch to book it in.

Mark has been fixing computers since the late '90s and went self-employed in 2008. Based in St Helens since 2013, he works evenings and weekends from his home in Laffak, doing friendly, affordable repairs for PCs, laptops, and Macs. See reviews on Google
Problem with your MacBook screen?
Send me the model number from the bottom of the case and I'll find the right display and give you a price. Message me to book a time to drop it off.
★★★★★"Thank you so much for helping me with my MacBook after I spilled water on it. Mark was super helpful and fast, he followed up on some issues I had with my trackpad and the drying out and cleaning did the job and saved my laptop. Highly recommend, especially if you have no idea about tech and are worried about getting ripped off."
— Megan Robinson, via Google